# Esp32 Brain
Code running on the main controller.
# Working Environment
Tools:
* Enveronment: ``PlatformIO``
* Framework: ``Arduino``
* Code editor: ``Visual Studio Code``
* MQTT Broker: ``shiftr.io``
Hardware:
* Mcu: ``ESP 32``
# How to build and Flash
Setup Visual studio Code
--------------------------
The VS code setup Instructions are available in Getting Started.
* Setup Visual studio code according to the Host operating system.
* Install PlatformIo extension inside VS code
* Make sure that ESP32 Dev Module is selected, and Framework as Arduino
Building and Flashing Application:
----------------------
To build the application, clone the `affbotics_software` repo and go to the folder `ESP32_AGV_brain`
* Pull the repository locally
* Navigate to the directory ``affbotics_software/firmware/avg/ESP32_AGV_brain/``
* Select the COM port
* Click Upload
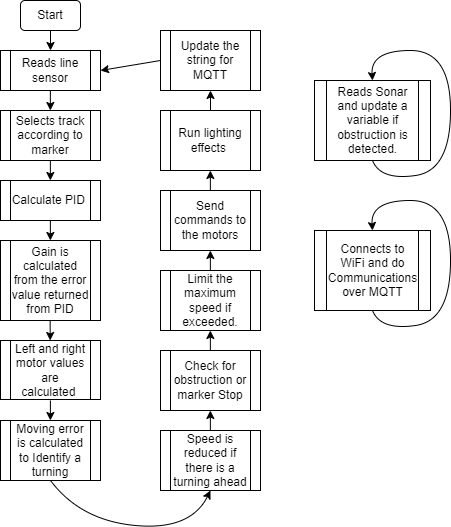
# Program Flow
Basic Workflow:
----------------
Firmware is present in ``affbotics_software/firmware/avg/ESP32_AGV_brain/src/main.cpp``
* Esp32 will connect to the wifi when booted
* It will read the line sensor and Ultrasonic sensor calculate the values and sends commands to the motor via Modbus
Am a Geek:
------------
* WiFi ssid and password can be changed by editing ``const char ssid[]`` and ``const char pass[]``
* MQTT broker can be changed by editing the line ``client.connect("esp32", "public", "public" ))`` and ``client.begin("public.cloud.shiftr.io", net);``
* PID values can be tweaked by changing values of variabled ``kp, ki, kd``